If you want to host your own domain name with InfinityFree, the default way to verify your domain is to set the nameservers first. However, there are cases where setting the nameservers ahead of time is not desirable (for example if you have an existing site which cannot go down) or if your domain provider does not let you set our nameservers.
Fortunately, InfinityFree now has the ability to host your domain name with us without having to change your nameservers ahead of time! This guide explains how to set this up, along with some other useful information.
How to add your domain with CNAME verification
Step 1: Try to add the domain name to your account
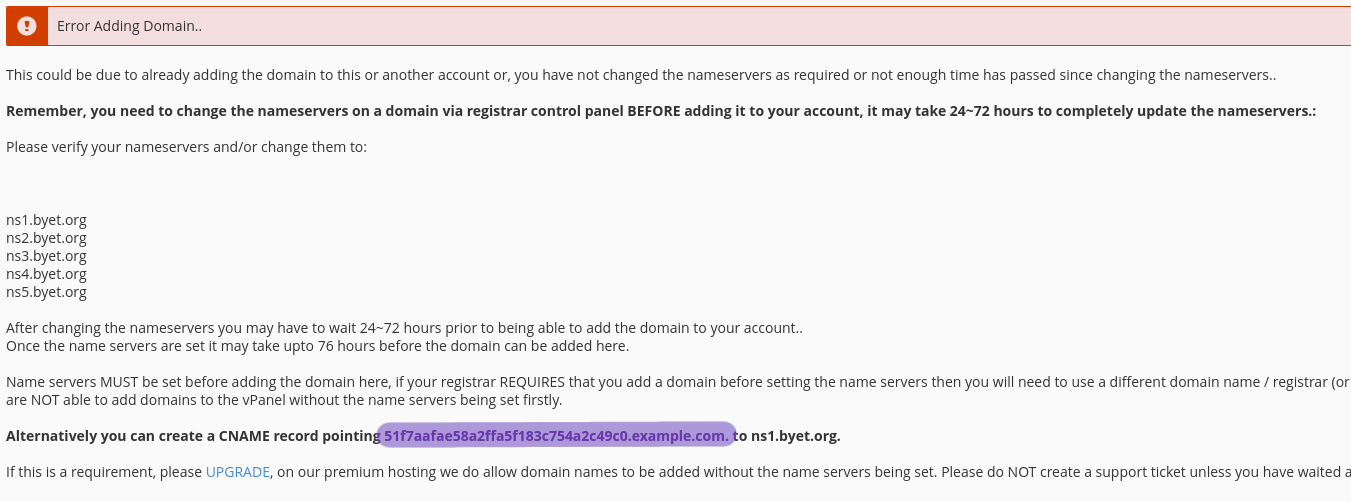
The first step to the CNAME verification is to just try adding the domain without any CNAME record set. This will not work, and you will see an error message. However, the error message will also give you a CNAME record and value to use.
For the domain “example.com”, the subdomain for the CNAME record is 51f7aafae58a2ffa5f183c754a2c49c0.example.com, and the value is ns1.byet.org.
Through the Client Area
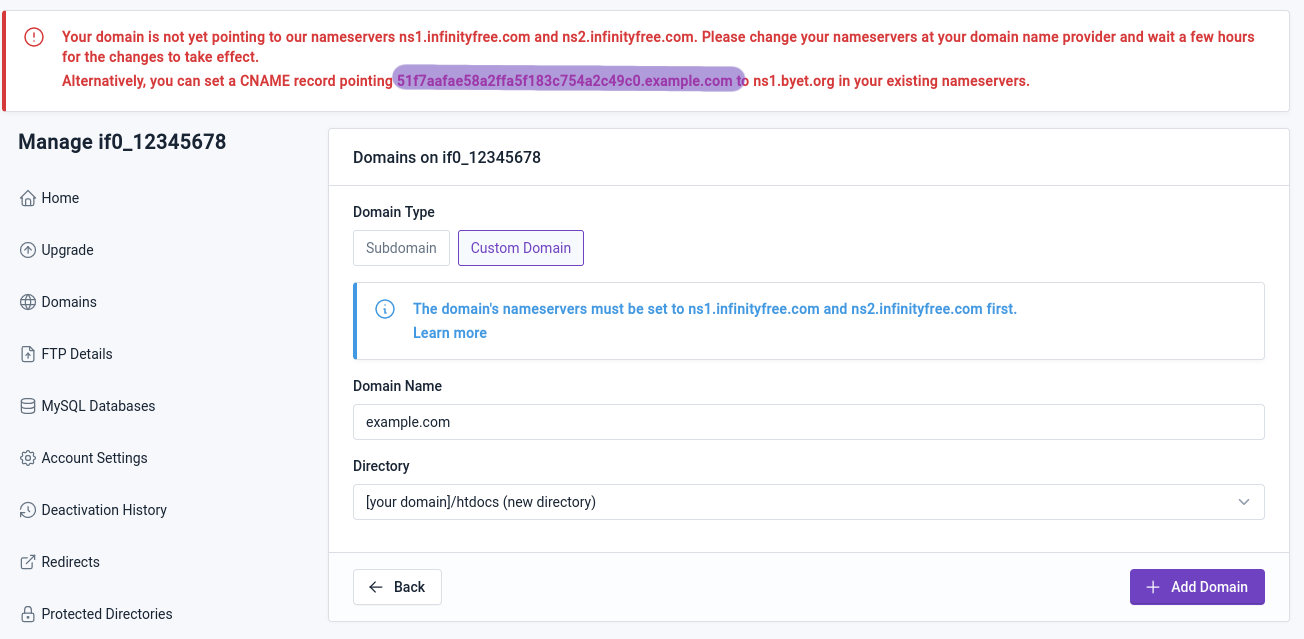
Through the Control Panel
Step 2: Add the CNAME record
Now you know which CNAME record needs to be set up, it’s time to configure it on your domain name.
You will need to set this up with your current DNS provider, i.e. the company whose nameservers are currently in use on your domain. This can be your previous hosting provider, your domain name provider, or any other provider you may have configured.
If you’re not sure which nameservers are in use, please check the settings at your domain name provider. If you don’t have a DNS provider right now, most domain name providers also provide this service.
The exact instructions on how to add the CNAME record depend on your DNS provider.
This is how it would look like in our control panel:

Step 3: Wait for DNS caching/propagation
With the CNAME record set up, you’ll need to wait for the setting to take effect. This can take anywhere between around 30 minutes, to up to 24 hours.
This has to do with a number of factors, both from your DNS provider and from us, that affect how long this takes.
You can also check whether your CNAME record was setup successfully by checking the CNAME record yourself, for example using Google’s Dig tool. It should show the desired CNAME record to be present:
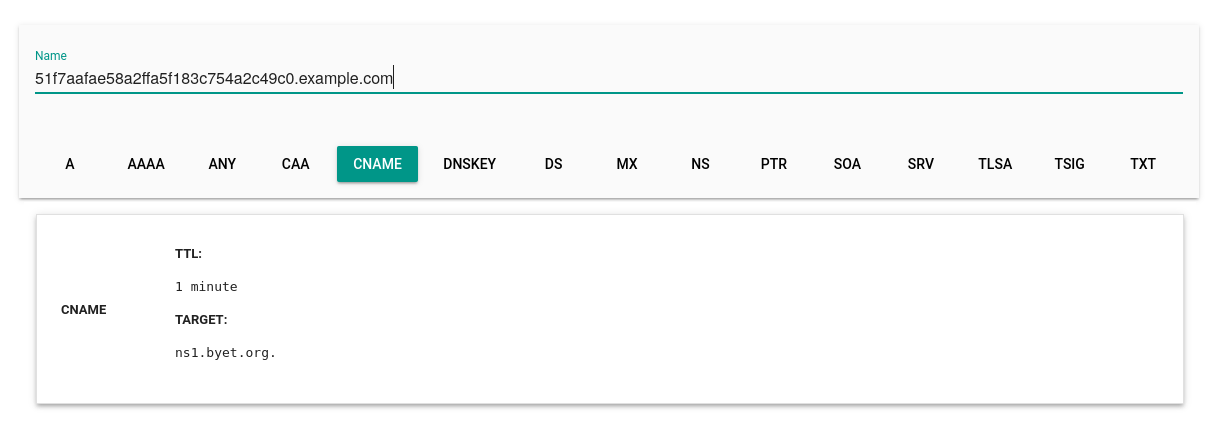
If your DNS lookup does not show the record as being present, please check whether you have setup the CNAME record correctly.
Step 4: Try to add the domain again
When the CNAME record has been set up, you’ve waited some time for the changes to take effect, and you verified the CNAME record was added successfully, now is the time to add the domain name for real.
Simply go back to the client area or control panel, and try adding the domain name again.
If the CNAME record was set up and detected correctly, your domain will now be added to your account!
Step 5: Point your domain name to your hosting account
The domain name is now added to your account, but now you’ll still need to update the setting to make sure your website actually works.
There are two ways to do this:
- Change the nameservers of your domain. If your domain provider required the nameservers to be configured beforehand, you can now try pointing the domain to our nameservers again. Our nameservers should now be accepted, and by setting the nameservers your domain name will start working. See: How to point your domain name to InfinityFree nameservers
- Add or update your domain’s DNS records. If you can’t or don’t want to use a different DNS provider, you can also update your domain’s DNS records to point to our servers. This process is explained in more detail in: How to point your domain to InfinityFree from other nameservers
Limitations
Because the current CNAME verification is an early version, there are some limitations to the setup.
Most importantly, CNAME verification can only be used when adding a domain to an existing account.
This means that:
- You cannot use CNAME verification while creating a new account. If you want to create a new account with a domain on which you want to use CNAME verification, you can create the account with a free subdomain first, and then add your own domain name to this account.