Connecting your domain to InfinityFree is typically done by changing your domain’s nameservers to those provided by InfinityFree. However, there are instances where you might prefer or need to maintain control over your DNS settings, such as:
- You require advanced DNS configuration options beyond what InfinityFree provides.
- Your domain registrar doesn’t support custom nameserver settings.
- You want to host only certain subdomains with InfinityFree.
- You need to use specific features available only through third-party DNS providers (e.g., Cloudflare).
Fortunately, it is possible to host your website on InfinityFree while using external nameservers, provided you correctly configure the DNS records for your domain.
This guide will walk you through the steps using Spaceship as an example DNS hosting provider.
Step 0: Add Your Domain to Your InfinityFree Hosting Account
Before pointing your domain to your InfinityFree hosting account, ensure it is linked to your account on InfinityFree. This means your domain should appear in the Domains list within the InfinityFree client area.
You can add your domain to your hosting account via the client area or control panel. During this process, you will need to verify your domain ownership by adjusting DNS settings. You have two options:
- Change your domain’s nameservers: Temporarily switch to InfinityFree’s nameservers to verify ownership, then revert to your preferred DNS provider.
- Set up a CNAME record: Verify ownership without changing nameservers.
For detailed instructions, refer to this guide:
Step 1: Locate Your Hosting Account’s IP Address
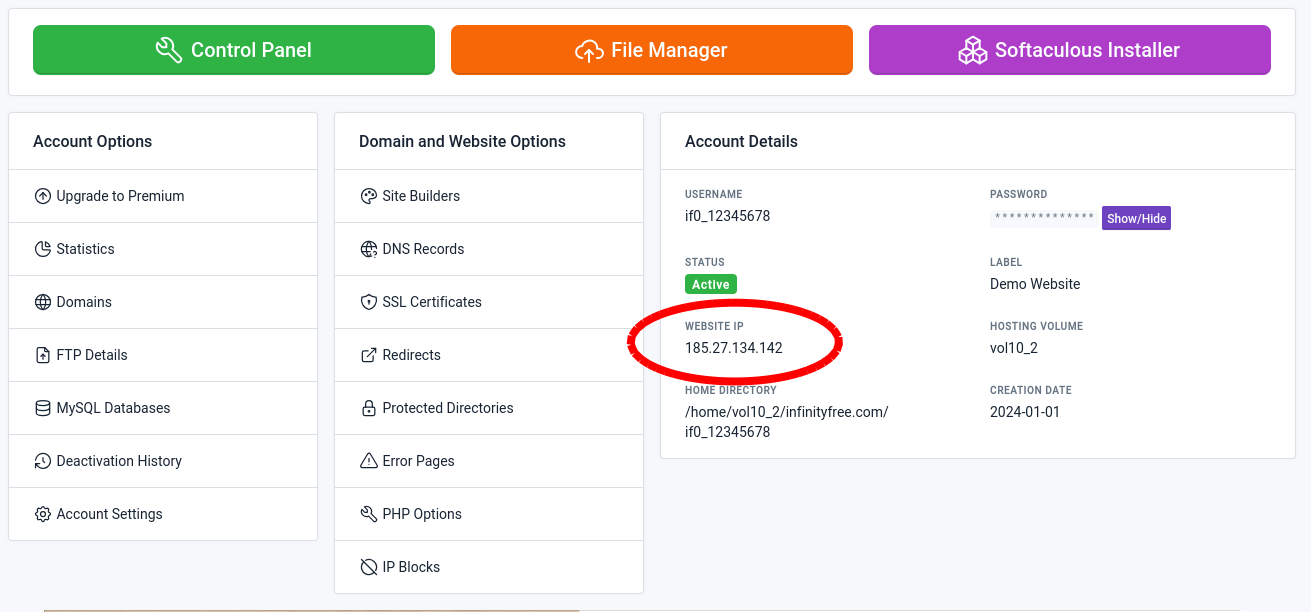
To properly configure your DNS, you’ll need the IP address associated with your InfinityFree hosting account. This is the address where your site will be hosted.
To find your Website IP:
- Log in to the InfinityFree client area: https://dash.infinityfree.com
- Navigate to the Accounts section.
- Select your hosting account from the list.
- In the Account Details panel, note the value under Website IP.
Step 2: Access Your DNS Provider’s DNS Management Tool
With your Website IP in hand, the next step is to access the DNS management section of your chosen DNS provider. Since interfaces vary across providers, this guide uses Spaceship as an example.
To manage DNS records on Spaceship:
- Log in to your Spaceship account.
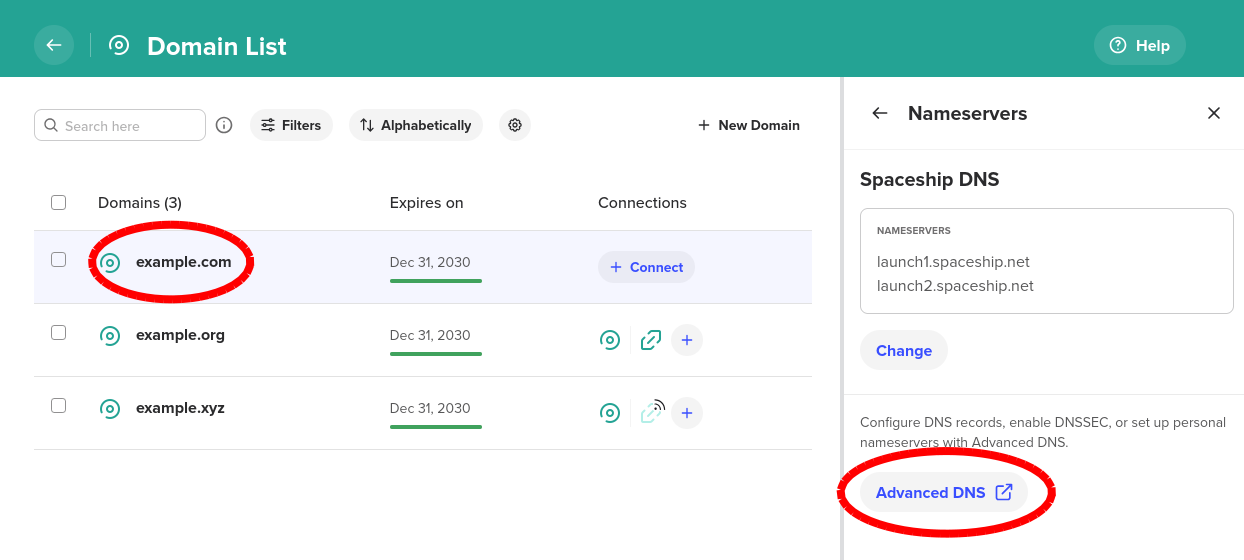
- Go to the Domain List.
- Select your domain, then click on Nameservers.
- Click the Advanced DNS button.
Step 3: Remove Conflicting DNS Records
Before adding new DNS records to point your domain to InfinityFree, you must first remove any existing records that might conflict.
Look for any records where the Host value is @, www, or your domain name (without subdomains), and the Type is A, AAAA, or CNAME. Delete these records.
Step 4: Add New DNS Records
Now, you’ll need to create two new DNS records to point your domain to InfinityFree:
- Record 1:
- Host:
@or your domain name. - Type:
A. - Value: The Website IP you found in Step 1 (e.g.,
185.27.134.XXX).
- Record 2:
- Host:
www. - Type:
CNAME. - Value: Your domain name.
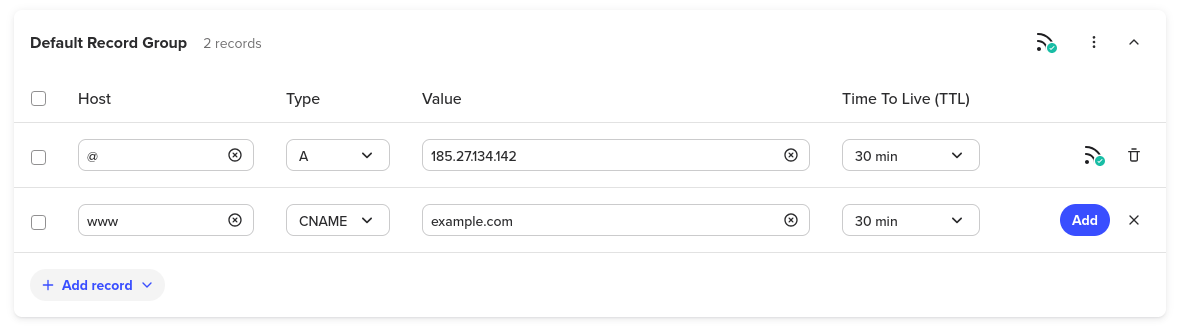
You do not need to modify other record types, such as MX or TXT. The TTL (Time to Live) setting can remain at the default value provided by your DNS provider.
Step 5: Configure DNS for Subdomains
If you plan to host subdomains (e.g., blog.example.com) on InfinityFree, you’ll need to add DNS records for those subdomains as well.
First, remove any conflicting records for your subdomain, specifically those of type A, AAAA, or CNAME.
Then, add a new DNS record:
- Host: Your subdomain (e.g.,
blog). - Type:
CNAME. - Value: Your domain name.

Step 6: Allow Time for DNS Propagation
Once you’ve configured all necessary DNS settings, it may take some time for the changes to propagate across the internet. This process can take up to 72 hours.
For more information about DNS propagation and how to check if your website is online, please refer to this article: